
Small refrigerators showcase big problems. Your 700BR undercounter unit or UW-24 wine cooler holds maybe 5 cubic feet compared to 20+ in a full-size refrigerator. Less mass means less temperature stability. Open the door for 30 seconds and the whole cabinet warms up.
We see this pattern constantly in Atlanta: homeowner calls about an ID-24 drawer not cooling, assumes the compressor died, but the unit just can’t recover from someone leaving it open while unloading groceries. Or a wine cooler not cooling complaint turns out to be a unit fighting against a kitchen that hits 78°F every afternoon.
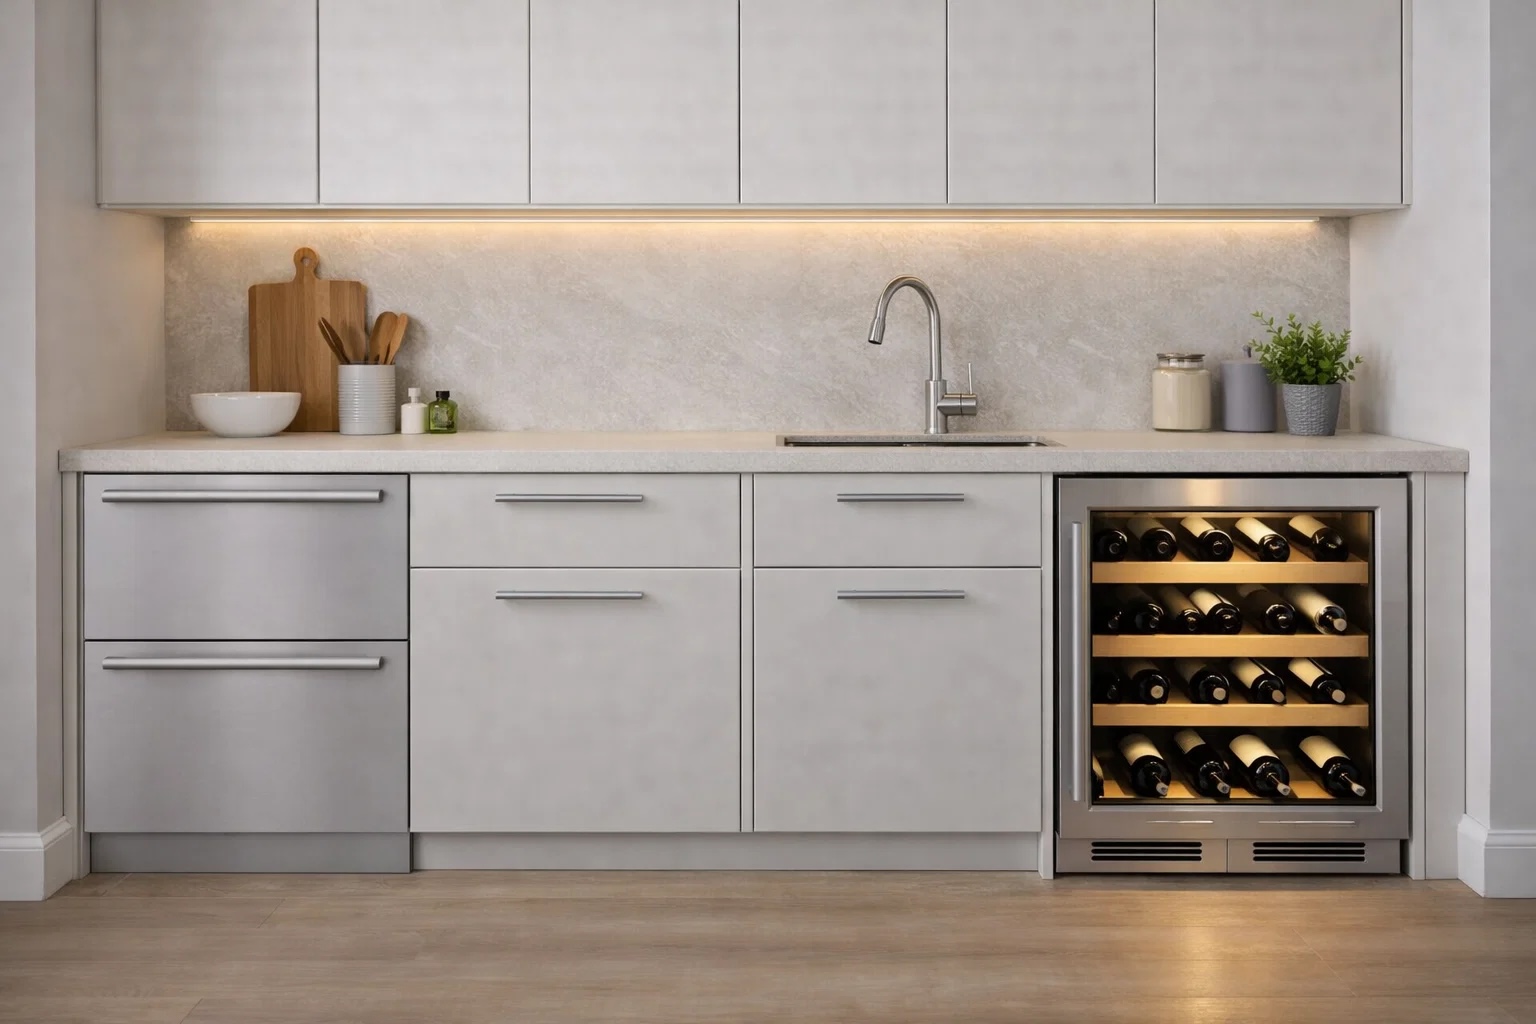
Here’s the thing about undercounter models: the 315W, 700BC, 700BCI, 700BF, ID-27, ID-30, UC-24, DEC2450W are engineered for tight spaces with limited airflow. That design creates vulnerabilities. Wine units need precise temperatures (55°F ±2 degrees) but have tiny compressors and minimal insulation thickness because they have to fit undercounters.
This guide addresses why compact units warm up so quickly, what thermal mass means for your undercounter refrigerator, and which components fail most in small-format cooling systems. We cover just those very issues that matter for drawer fridges and wine storage.
You’ll learn what’s normal temperature behavior for these units (spoiler: they’re not as stable as full-size models) and what indicates real failure requiring repair.
Why Small Refrigerators Warm Up Fast
Your compact unit might be working fine—the problem is physics, not failure.
Full-size refrigerators have 18-22 cubic feet of interior space. Food, shelves, air, walls—all that mass holds temperature. Open the door for a minute and maybe the front items warm up slightly. The back wall stays cold. Total temperature rise: 2-4 degrees. Recovery time: 5-8 minutes.
Drawer models have 5-6 cubic feet. Same one-minute door opening? Temperature jumps 8-12 degrees throughout the entire contents. Everything gets exposed at once. Recovery takes 15-20 minutes with the compressor running hard.
This is not a malfunction. It’s geometry.
The Numbers That Matter
Unit Type | Volume | Temp Rise (1 min open) | Recovery Time |
Standard refrigerator | 18-22 cu ft | 2-4°F | 5-8 minutes |
24-inch models | 4-5 cu ft | 10-13°F | 18-22 minutes |
27-inch drawer | 5-6 cu ft | 8-12°F | 15-20 minutes |
30-inch units | 5-6 cu ft | 8-12°F | 15-20 minutes |
Wine storage | 4-5 cu ft | 10-15°F | 18-25 minutes |
Beverage centers | 5 cu ft | 7-10°F | 12-18 minutes |
Wine units suffer worse. Bottles have air gaps between them—less thermal mass than a drawer packed with food. One bottle removal exposes the entire collection to room air. The UW-24 and similar models need to maintain 55°F within 2 degrees, but physics works against them.
Beverage Centers Face Similar Problems
Half-empty beverage units swing 15+ degrees per opening. Cans and bottles help because liquid holds temperature better than air, but stock it at 30% capacity and you’re fighting a losing battle.
The IC-24 and other 24-inch formats suffer most because they have the smallest volume relative to surface area. The DEC1850FI and DEC1850W face identical thermal challenges—compact spaces simply can’t hold temperature like larger units.
Why is my drawer fridge warm? Often because someone opened it repeatedly during meal prep. Each event warms the contents. The compressor runs constantly trying to recover but never fully catches up before the next opening.
What Helps
Fill empty space. Water bottles, extra beverages, even sealed containers of water work as thermal mass. An 80% full unit holds temperature three times better than one at 30% capacity.
Group items together. Clustered cold items stabilize each other. Spread-out storage means more warm air pockets.
Use frozen gel packs in wine storage. Wrap them so they don’t touch bottles directly. They buffer temperature swings and add thermal mass.
Don’t block vents trying to add mass. Don’t overfill to where air can’t circulate. Find the balance.
PRO TIP: Keep your compact unit at least 70% full. If you can’t stock it properly, add sealed water bottles as ballast. They act as cold batteries that stabilize temperature between door openings.
Kitchen Temperature Matters More Than You Think
Your wine fridge might be struggling because of the environment:
Kitchen Temp | What Happens | Result |
68-70°F | Normal operation | Unit performs to specification |
72-75°F | Increased cycling | Compressor runs 30% more, slower recovery |
76-80°F | Struggling | May not reach setpoint, temperature issues appear |
80°F+ | Failing | Constant operation, can’t maintain target |
Most Sub-Zero undercounter models rate for 70°F maximum ambient. Atlanta kitchens hit 75-78°F easily June through September. That’s not a warranty-covered failure. Its installation environment exceeds specifications.
We’ve diagnosed dozens of units that worked perfectly in February. Come July with the kitchen at 77°F, the same unit can’t keep up. Different season, different performance, same refrigerator.
Door Openings Kill Compact Units
Surface area destroys small refrigerators.
Open a full-size unit for 60 seconds. The back shelves might warm a degree or two. Upper compartments stay protected. Cold air hangs around the bottom. Maybe 40% of the interior gets exposed to room temperature.
Open a drawer unit for the same 60 seconds. Every single item inside gets blasted with 72°F kitchen air. The entire 5 cubic feet warms simultaneously. No protected zones. No cold pockets staying stable.
The Compounding Problem
Here’s morning breakfast with a drawer refrigerator:
7:00 AM – Open for milk (30 seconds) → temp climbs to 46°F
7:12 AM – Unit recovered to 40°F
7:15 AM – Open for butter (20 seconds) → temp jumps to 44°F
7:20 AM – Open to return milk (15 seconds) → temp hits 46°F again
7:45 AM – Unit finally back to 38°F
Three openings in 45 minutes. The compressor ran almost continuously. This is why people call saying their unit doesn’t work right. It never got a chance to recover.
Multiply this across a day:
- Breakfast: 3-4 openings
- Lunch: 2-3 openings
- Dinner prep: 5-7 openings
- Evening: 2-3 openings
Total: 12-17 door events. Each requires 15-20 minute recovery. The math doesn’t work. Temperature complaints make perfect sense when you track actual usage.
Wine Storage Gets Hit Harder
Wine units face precision requirements that compact fridges don’t. Food storage tolerates ±5°F variation. Wine needs ±2°F stability.
The problem intensifies because people browse wine collections. You don’t grab a bottle in 10 seconds. You look, consider, maybe pull one out to check the vintage, put it back, grab another. Two-minute door openings happen regularly.
Opening Duration | Temp Rise | Recovery Time | Wine Impact |
30 seconds | 4-6°F | 12-15 min | Minimal |
1 minute | 8-10°F | 20-25 min | Noticeable |
2 minutes | 12-15°F | 30-40 min | Damages delicate varietals |
3+ minutes | 15-20°F | 45+ min | Accelerates aging, ruins champagne |
Units like the DEC3050W often face usage patterns they can’t handle. Works beautifully when you open it once a day for 30 seconds. Use it actively during a dinner party? Temperatures wander from 53°F to 59°F and back.
That’s not always fixable with repair. Sometimes it’s a design limitation of compact wine storage in real-world use.
Testing Usage vs. Failure
Need to know if your 315W problem is the unit or how you use it?
The 24-hour test:
- Empty perishables to another refrigerator
- Set the unit to 38°F
- Put a separate thermometer inside
- Close it and don’t open for 24 hours
- Check temperature every 4 hours through the door (many have glass or you can peek without opening)
Results:
- Reaches and holds 38°F? The unit works. Usage needs adjustment.
- Never reaches setpoint or can’t hold it? Component failure. Time for service.
This simple test separates physics from malfunction. Saves unnecessary service calls.
Reducing Opening Impact
You can’t eliminate door openings, but you can minimize damage:
- Plan ahead. Get everything needed in one opening instead of three. Make a mental list before you open the drawer.
- Organize by frequency. Daily-use items in front for quick access. Rarely-needed items in back.
- Consider your openings. Let the unit recover 20+ minutes between uses when possible. Don’t open it three times in five minutes.
- For wine storage specifically: Know which bottle you want before opening. Don’t browse with the door open. Temperature stability matters more than convenience.
- Track patterns if you’re skeptical. Install a wireless thermometer with logging capability. You’ll see exactly how door openings affect your specific unit and whether it recovers properly between uses.
When Patterns Reveal Real Problems
Normal behavior looks like this:
- Temp rises 8-12°F during reasonable opening
- Returns to setpoint within 20 minutes
- Compressor cycles off once recovered
- Pattern repeats consistently
Failure looks like this:
- Temp rises 8-12°F but takes 45+ minutes to recover
- Never quite reaches setpoint before next opening
- Compressor runs constantly regardless of usage
- Temperature drifts even when closed overnight
The difference matters. Fixing temperature issues in compact units requires distinguishing between normal behavior and broken components.
What Breaks in Compact Units
Real component failures happen. Here’s what we see most often in Atlanta.
Evaporator Fan Motors
Small fans work harder and fail faster. Compact models use fan motors moving air through tight spaces. Bearings wear out. Motors overheat. Typical lifespan: 5-8 years.
How you know:
- Compressor runs but nothing cools
- One zone works, another doesn’t (dual-zone wine storage)
- Frost builds on the back wall inside
- Complete silence where you should hear gentle airflow
Put your ear near the unit when the compressor runs. Hear a soft fan hum? It’s working. Total silence? Fan’s dead.
Fan failure ranks second for diagnosis. The compressor does its job creating cold refrigerant, but dead air means no circulation. Cold stays trapped in the evaporator coils. Your food stays warm.
Models from the 700 series—including the 700BC, 700BCI, 700BF, and 700BR—commonly experience this after 6-8 years. The ID-27 drawer and similar units show the same pattern.
What it costs: $250-$400 parts and labor
Compressor Start Relays
The start relay tells the compressor when to fire up. When it fails, you hear clicking sounds—the compressor trying to start but not succeeding.
The telltale sound:
Click… click… click… every 2-3 minutes. The compressor never actually starts. The cabinet gradually warms over hours as whatever cold remained slowly dissipates.
Don’t ignore this. Failed start relays force repeated start attempts that can damage the compressor. A $180 relay repair becomes a $1,200 compressor replacement if you wait.
The UC-24 and IT-30 models commonly develop this problem around year 6-10. The relay itself costs $40-$60 but diagnosis takes equipment.
What it costs: $180-$280
Temperature Sensors and Thermostats
Drawer units and wine storage that won’t maintain proper temperature often have sensors reporting false data. The control board makes decisions based on sensor input. Wrong information equals wrong cooling behavior.
Testing sensors yourself:
Symptom | What’s Happening | Fix |
Display shows 38°F, thermometer reads 52°F | Sensor reads low (board thinks it’s colder than reality) | Replace sensor |
Wild swings: 35°F to 50°F repeatedly | Intermittent connection or failing sensor | Check wiring, replace sensor |
Compressor never runs, display normal | Sensor stuck reading “cold enough” | Replace sensor |
Runs constantly, never satisfied | Sensor reading high constantly | Replace sensor or thermostat |
Atlanta’s temperature swings stress sensors mounted near compressors. Summer heat pushing kitchen to 78°F, winter cooling to 68°F—sensors see even bigger extremes near the compressor. They fail.
The IC-30, IC-36, and ID-30 all use similar sensor technology. When they fail, the symptoms look identical across models. Panel-ready installations like the DEC2450R and DEC2450FI sometimes have sensors mounted in locations that make them more vulnerable to temperature extremes.
Sensor replacement takes 45 minutes if you know what you’re doing. The part runs $80-$140. Labor adds $120-$210.
What it costs: $200-$350
PRO TIP: Sensors degrade gradually. If your 5-7 year old unit shows temperature inconsistencies of 2-3 degrees, replace the sensor now. Waiting until it reads 8 degrees off means months of inefficient operation damaging other components.
Control Boards
Units like the DEC2450W and other models with electronic controls sometimes have board failures that manage everything: compressor operation, defrost cycles, temperature regulation, error detection.
Boards fail from:
- Heat exposure (undercounter spaces trap heat)
- Power surges (older Atlanta homes have electrical issues)
- Moisture intrusion from humid Southern climate
- Age (7-10 years typical before failure)
Warning signs:
- Display shows error codes: “Service,” “EC40,” “EC50”
- Unit won’t respond to temperature changes
- Random on/off behavior with no pattern
- Complete power loss despite outlet working fine
If your unit flashes “Service,” try this before calling: unplug for 5 minutes, then plug back in. Clean the condenser thoroughly. Sometimes the board throws error codes when it detects excessive compressor run time—which happens with dirty coils. You might save a service call.
Control boards for compact models cost $280-$380.
Labor adds $150-$200.
Total: $430-$580.
Worth it on units under 8 years old. Questionable value on older units where other components are also aging.
The DET3050 and DET3650 models with top-mounted compressors have boards that see more heat stress than bottom-compressor models. They fail slightly earlier on average.
What it costs: $430-$580
Compressor Failure
This is an expensive scenario. Complete cooling failure in older units often means compressor replacement at $800-$1,400 depending on model and refrigerant type.
At this price point on a compact unit that’s 8+ years old, you’re looking at 50-70% the cost of a new unit. Consider:
- Age of other components
- Efficiency improvements in newer models
- Remaining useful life after repair
- Whether the unit was ever quite right for your usage
We give honest recommendations. Sometimes replacement makes more financial sense than repair, even though we’d rather do the work and earn the money. Better to tell you the truth than have you spend $1,200 fixing a unit that dies again in 18 months.
The DEC3050 and DEC3650 models, along with larger 36-inch units like the IT-36, have bigger compressors that cost more to replace. The DEC2450FI and similar 30-inch formats fall in the middle of the price range.
What it costs: $800-$1,400
Step-by-Step Diagnostics
Work through these in order. It takes about 30 minutes total.
First Five Minutes: Basic Checks
Item | Steps |
Power and display: | Unit plugged in, outlet works (test with phone charger) Display shows temperature, not blank or error codes If no display: check breaker, try different outlet |
Physical inspection: | Door closes fully, seals tight all around Nothing blocking interior vents Toe-kick grille clear (nothing pushed against it) No visible ice buildup anywhere inside |
Next Five Minutes: Listen and Feel
Item | Steps |
Compressor check: | Go to the lower back area of the unit. Put your hand on the compressor (warm metal cylinder). Should feel warm (not hot, not cool) Should vibrate slightly when running Should cycle on/off periodically (not constant, not never) |
Fan check: | Open the unit briefly, then close it. Wait 2 minutes with your ear near the door. Should hear soft fan hum when door’s closed Fan stops when door opens (on most models) No fan sound = possible fan failure |
Unusual sounds: | Clicking every few minutes = start relay problem Loud humming/buzzing = compressor stress or failure Rattling = loose component or debris in fan |
24-Hour Temperature Test
Item | Steps |
This is the definitive test: | Place separate thermometer inside unit (not the built-in one) Set unit to 38°F (or 55°F for wine storage) Close and don’t open for 24 hours Check thermometer every 4-6 hours without opening (use camera through glass door if possible, or quick peek) Compare thermometer reading to display |
What the results mean:
Result | Diagnosis | Action |
Reaches and holds setpoint accurately | Unit works correctly | Adjust usage patterns |
Never reaches setpoint | Component failure | Schedule service |
Reaches setpoint but display reads 5+°F different | Sensor failure | Replace sensor ($200-$350) |
Takes 8+ hours to reach setpoint | Weak compressor or refrigerant low | Professional diagnosis needed |
Usage Pattern Test (48 Hours)
If the 24-hour test showed the unit CAN reach temperature, test whether usage is the problem:
Day 1 – Minimal use:
- Open only twice: morning and evening
- Keep door open under 15 seconds each time
- Track temperature stability
Day 2 – Normal use:
- Use normally: breakfast, lunch, dinner
- Count total openings
- Track how long temperature takes to recover after each
Compare Day 1 vs Day 2. If temperature stays stable on Day 1 but struggles on Day 2, you’ve confirmed usage is overwhelming the unit’s capacity. Not failure—limitation.
Repair or Replace? The Honest Math
Not every situation deserves a repair. Here’s how to decide.
When Repair Makes Sense
Unit is under 7 years old:
Components have plenty of life remaining. One failure doesn’t indicate system-wide problems. Repair extends useful life significantly.
Failure is isolated and affordable:
- Fan motor: $250-$400
- Sensor: $200-$350
- Start relay: $180-$280
- Control board: $430-$580
These repairs on a 4-6 year old unit buy you another 5-8 years. Good return on investment.
The unit has been maintained:
Regular condenser cleaning, proper installation with adequate ventilation, no history of multiple repairs. First-time failure on well-maintained equipment usually means you fix it and move on.
When Replacement Makes More Sense
- Unit is 10+ years old with major failure:
Compressor replacement costs $800-$1,400. At 10 years, other components are also aging. You might fix the compressor today and face a $400 control board failure next year. - New compact units cost $2,000-$4,000. After a $1,200 compressor repair, you’ve spent 30-60% of replacement cost on a unit that’s still 10 years old.
- Multiple problems appearing:
Fixed the fan last year, now the compressor won’t start? Pattern of escalating repairs means system-wide age issues. Throwing money at a dying unit rarely works out. - Unit was always undersized for usage:
If your wine storage can’t handle the actual opening frequency, or your 24-inch model gets overwhelmed by family size, repair doesn’t fix the fundamental problem. You need a bigger unit or different usage. - Kitchen environment too challenging:
Atlanta heat pushes the kitchen to 78°F consistently, humidity issues, poor ventilation—some installations fight against the equipment. Repair might work for a season but you’ll face problems again.
Atlanta-Specific Considerations
- Hot summers: June through September temperatures stress compact units significantly. Older units that struggled through last summer might not make it through another.
- Older homes: Many Atlanta homes built before 2000 have inadequate kitchen ventilation. AC vents don’t reach corners where undercounter units live. These environments kill compact refrigerators faster.
- New construction: Modern homes often have better-suited spaces for upgraded units with improved efficiency. If you’re in a newer home and the unit is old, upgrading makes sense.
We’ve seen $1,200 compressor repairs on 12-year-old units work great for 2 years, then control boards fail. Sometimes cutting losses and upgrading is smarter than prolonging the inevitable.
What Repairs Cost in Atlanta
Based on jobs we’ve completed in Buckhead, Virginia Highland, Brookhaven, Decatur, Sandy Springs:
Component | Parts | Labor | Total | Expected Life After Repair |
Evaporator fan | $120-$180 | $130-$220 | $250-$400 | 5-8 years |
Start relay | $40-$80 | $140-$200 | $180-$280 | 8-12 years |
Temperature sensor | $80-$140 | $120-$210 | $200-$350 | 6-10 years |
Thermostat | $90-$130 | $110-$170 | $200-$300 | 7-12 years |
Control board | $280-$380 | $150-$200 | $430-$580 | 5-8 years |
Compressor | $600-$900 | $300-$500 | $900-$1,400 | 10-15 years |
Condenser cleaning | $0 | $150-$200 | $150-$200 | Preventive maintenance |
All prices include:
- Genuine Sub-Zero OEM parts
- EPA-certified refrigerant handling
- 90-day parts and labor warranty
- Travel within metro Atlanta (Buckhead, Midtown, Brookhaven, Decatur, Sandy Springs, Roswell, Alpharetta, Johns Creek)
Not included:
- Permit fees if required for refrigerant work (rare, only on commercial installations)
- After-hours emergency service (add $50-$75)
- Modifications to cabinetry or ventilation (separate quote)
PRO TIP: Schedule condenser cleaning in March or April before Atlanta heat arrives. Clean condenser reduces compressor strain all summer. Cost: $150-$200. Prevents: $800+ repairs later. Best money you’ll spend on appliance maintenance.
All Things Considered
Your troubleshooting starts with understanding what’s normal for compact units versus what indicates failure.
Small refrigerators warm up faster. They recover slower. They’re sensitive to door openings in ways full-size units aren’t. Some behavior that looks like failure is just physics.
But real component failures happen too. Fans burn out. Sensors lie. Control boards quit. Compressors die. Knowing the difference saves money and prevents throwing parts at problems that don’t need them.
What you can do now:
- Run the 24-hour closed-door test with a separate thermometer
- Clean the condenser coils if not done in the last 6 months
- Track door openings for 48 hours to see usage patterns
- Check that kitchen temperature stays under 72°F
- Verify the unit is at least 70% full for proper thermal mass
When to call us:
- Unit won’t reach setpoint even when closed for 24 hours
- Compressor makes clicking sounds but won’t start
- Display shows error codes
- Temperature sensor reads 5+ degrees different than separate thermometer
- You’ve done basic checks and still have problems
We serve Buckhead, Virginia Highland, Brookhaven, Decatur, Sandy Springs, Roswell, Alpharetta, Johns Creek, and surrounding metro Atlanta areas.
FAQ
Why won't my wine storage maintain temperature when it's 75°F in my kitchen?
Most wine coolers rate for 70°F maximum ambient temperature. Atlanta kitchens hit 75-78°F June through September. The unit operates at its limit or slightly beyond.
Solutions: Improve kitchen cooling (better AC), move units to the basement or interior closet with climate control, or upgrade to commercial-grade wine storage with more robust cooling capacity.
This isn’t failure. It’s an environmental limitation. Like expecting your car AC to keep you comfortable when it’s 110°F outside—it does its best but physics has limits.
How often should I clean the condenser in my drawer refrigerator or beverage center?
Every 6 months in Atlanta. Our pollen season and general dust make this region harder on condensers than dry climates.
Schedule: March/April (before summer heat) and September/October (before holiday cooking season).
It takes a technician 20 minutes. Costs $150-$200. Prevents 80% of service calls we run. Dirty condensers force compressors to work harder, creating heat buildup that accelerates component aging.
DIY option: Remove toe-kick grille, gently vacuum condenser coils with brush attachment. Don’t bend fins. If you can’t see through the coils, they’re too dirty for DIY cleaning.
Can I fix temperature problems without pulling the unit out of the cabinet?
Depends on what’s broken:
Accessible from front:
- Temperature sensor replacement
- Control board work (usually)
- Fan testing and replacement (most models)
- Basic diagnostics
Requires pulling unit:
- Compressor replacement
- Refrigerant system repairs
- Deep condenser cleaning
- Checking for leaks
Built-in undercounter units take longer to access, which adds labor costs. Factor this into repair decisions on older units. Sometimes a $300 repair becomes $450 just due to access difficulty.
